How to use the Leave Calendar
Getting around the Leave Calendar.
The leave calendar will be different for everyone on the portal such as HR Admins and Bureau users will be able to see every persons leave requests on the calendar, managers will be able to see their own requests as well as everyone who is in their team, whereas employees will only see their own requests.
 The leave calendar page is the best way to check all the leave that your employees are applying for. It holds all the information in one place and has a couple of additional panels over the dashboard calendar.
Subscribe to Calendar.
What this feature does is allows people in the company to see who's on leave by synching up with outlook.
The Bar of Tabs.
All Current
This shows all of the current leave requests, approved, declined, everything.
Requested
This only shows any requested leave.
Escalated
This shows any leave that has been given to another manager after the previous manager took to long to approve said leave.
Approved
This shows only approved leave.
Declined
This shows only declined leave.
Exported
This shows only leave that has been transferred to the payroll system.
Withdrawn
This shows only leave that has been removed by the employee that asked for it.
All
This shows all leave that has been sent through the portal since the beginning.
Week
Only shows leave requests that have come through from that week, coinciding with any given category.
Month
Only shows leave requests that have come through from any chosen month, coinciding with any given category.
Everyone
This shows all leave requests for every employee on the portal.
Just Me
This shows only leave requests for yourself on the portal.
The Calendar Header.
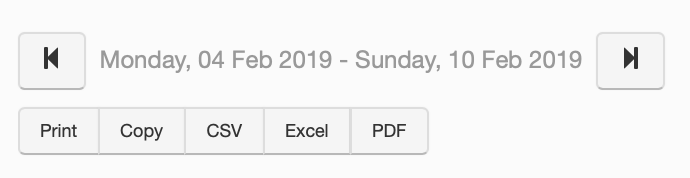
This is the segment that sits at the top left of the calendar, it allows you to do a couple of things.
Firstly, the dates at the top are directly related to whether you are viewing the calendar either weekly or monthly.
If you are in weekly view, then you can cycle the calendar through the weeks, both forward and backwards by pressing the arrow keys, and it works the same in monthly view, it just moves by a month at a time.
Beneath that you have a few more options, you can either print the calendar to a local printer or copy it to a clipboard to be pasted wherever you choose. Next you have a few options to convert the calendar to some different file types. You can choose between a CSV file, an Excel spreadsheet or a PDF document.
The Calendar Itself.
The Calendar shows the full names of all your employees that are on the portal, it also shows what leave they are taking, when they are taking it, for how long and whether there are public holidays coming up.
This is also a bit different from the one on the dashboard as it has a few more options for how to use it, including a legend so you know what leave is which.
It clearly shows the dates at the top, if any leave has been taken, they will be shown in the corresponding colour according to the legend beneath the calendar. If you are not sure what the colours mean, they are named in the legend also.
If any leave taken is a solid colour then those days taken are full days, however, if they have stripes through them, then the days taken are half days.
You can also change the amount of entries you want visible on the calendar from anywhere from 10 to 100 employees, and you can change which page you are on by using the bottom right corner to either move one at a time or jump to the start or the end.
In reference to the legend that describes the calendar,
Blue - New or Escalated Leave
Green - Approved or Exported Leave
Red - Declined
Yellow - Withdrawn